Landing Pages & Traffic Distribution
An offer can have one or more landing pages that a user can land on.
It is possible to store all landing pages within one offer if they all represent the same product. If your ad campaign uses several tracking links that direct users to different web pages, you can see how to manage your landing pages and provide landing pages for affiliates to route traffic further in this guide.
Adding a New Landing Page
First, go to Offers > select the offer from the list > Landing Pages. To add a new landing page, click the + button.

Also, you can go to Manage > Add Landing Page.

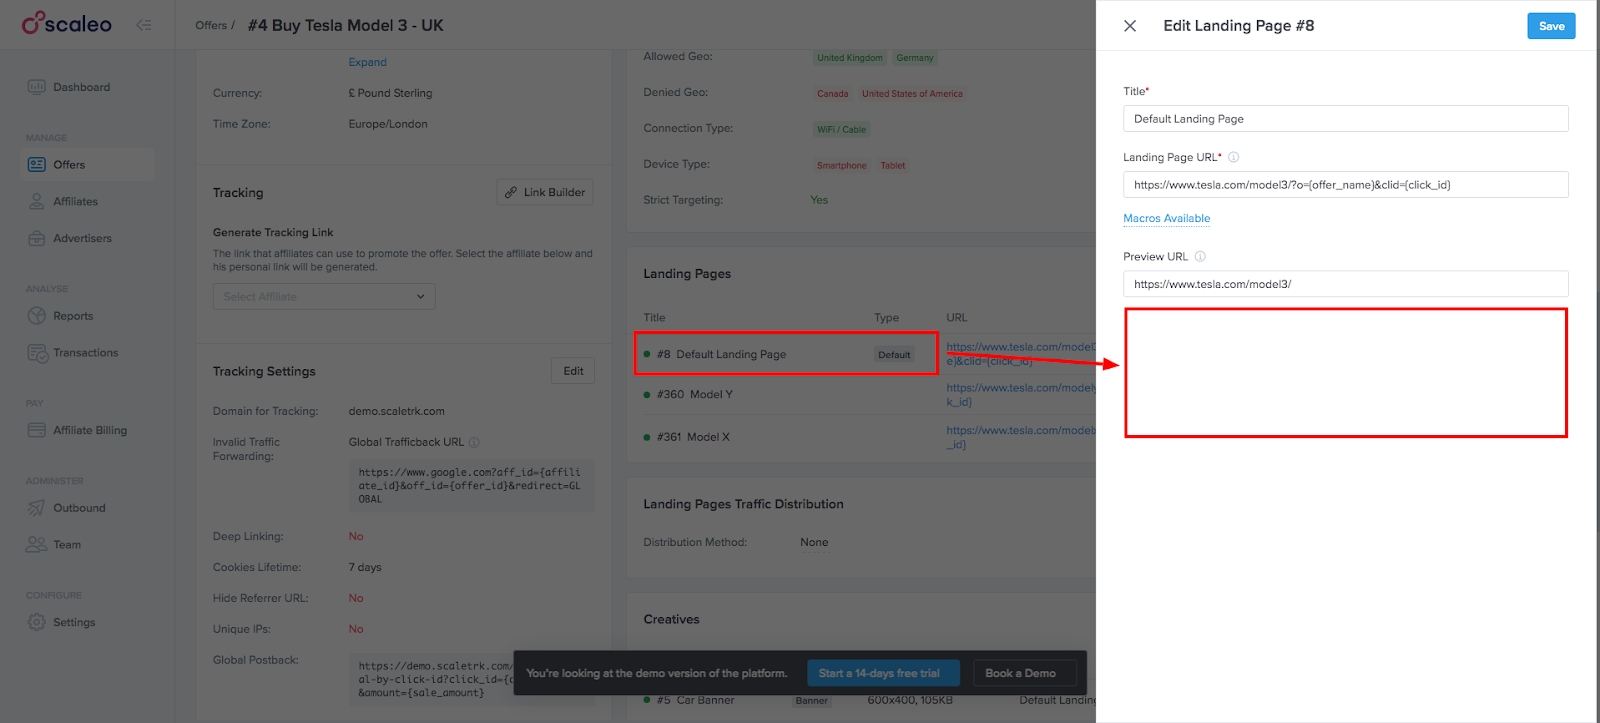
In that window, fill in the following fields:
- Title — the name of the page.
- Status — Active or Inactive. Select the Active status to make the URL available immediately, or Inactive status to disable the URL for now.
- Landing Page URL— the link on the advertiser side, where the Affiliate will send traffic to. For example https://www.landing-page.com.
- Preview URL — the link without Geo or other restrictions, where the affiliate can see the offer. The Preview URL can be added for every Landing Page.

Additional Landing Pages
You can add additional landing pages. All additional landing pages links could be added once the offer is already created on the platform. You can use any additional parameters with tracking macros to transfer tracking-related info.
Click on the Available Macros button to see the full list.
By clicking on the Advanced Options button, you can also specify Visible to Affiliates and Targeting.
Visible to Affiliates parameter is responsible for whether the URL is available to an Affiliate and can appear in their reports.
The Visible to Affiliates parameter can have the following values:
- Yes - The landing page is visible to all Affiliates
- No - The landing page is not visible to all Affiliates
- Icon with N, where N is the number of Affiliates (
) - The landing page is visible only for certain Affiliates
If the parameter is OFF, a list for selecting Affiliates who will see this URL will open. To set up visibility for a specific Affiliate, just click the + button next to the particular affiliate.

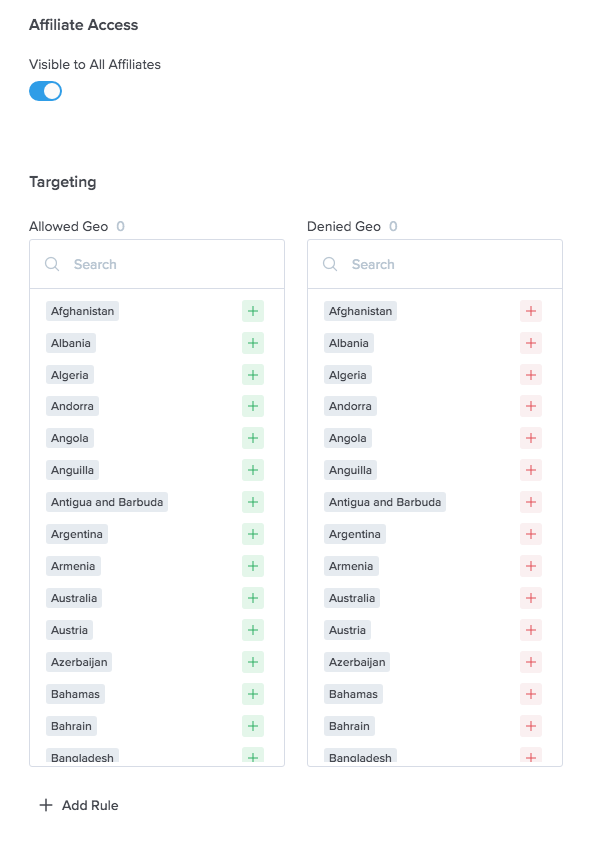
In Advanced Options, below Visible to Affiliates, you will find Targeting.
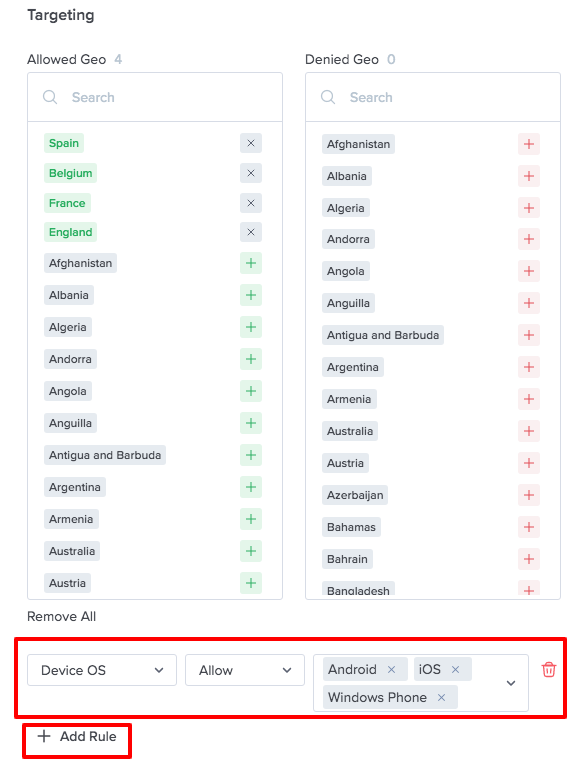
Targeting is a parameter for choosing targeting as in an offer, only at the level of one Landing Page - Geo and Advanced (Connection Type, Device Type, Device OS, etc.).
There is an option of allowed and denied Geo, and clicking the [Add Rule] button will enable you to add Advanced Targeting.
Don’t forget to click the Add button to apply changes.
Edit an Existing Landing Page
- First, go to Offers > select an offer from the list > Landing Pages.
- Select the URL in the list, hover over the link, and click the Edit button.

- You can change the Title, Status, Landing Page URL, Preview URL, Visible to Affiliates, and Targeting.
Note: Status and Advanced Options (Visible to Affiliates and Targeting) are not available for the Default Landing Page. The Default Landing Page is always visible and available to Affiliates.
Manage Offer Landing Pages
To manage Offer Landing Pages, go to Offers > select the offer in the list > Landing Pages > Manage.

You can preview the basic information about every link, including: Title, Type, URL, Preview URL, Visible to Affiliates, Targeting, and filter them by Status. This information is also available on the Offer’s page.

Landing Pages Traffic Distribution
Landing Pages Traffic Distribution is a functionality that allows the rotation of landing pages according to specific rules.
There are 4 options available:
- None
- A/B Testing
- Rotation
- Targeting Based
None
If the landing page is not specified in the tracking link, traffic is not distributed, and the traffic is redirected to the Default Landing Page.
If a non-default Landing Page is specified, please check:
- Status - URL must be Active
- Visible to Affiliates- URL must be visible to the Affiliate
- Targeting - if targeting is selected, the click must match this targeting.
If everything meets the criteria, we redirect to this URL; if not, go through the Trafficback Settings and record a click in Invalid Clicks.

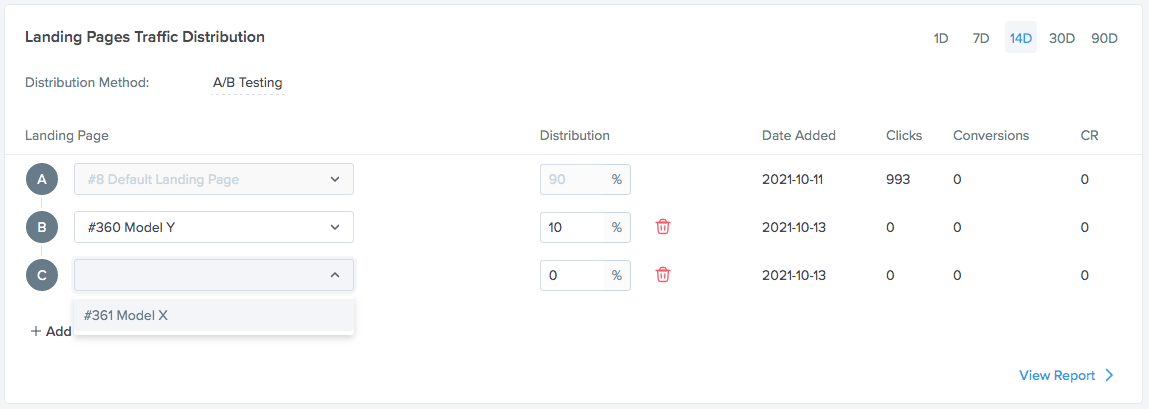
A/B Testing
Purpose: A/B split testing new Landing Pages to understand which one works better without providing it to Affiliates. Send a small percentage of traffic to test the pages out.
You can see statistics on Landing Pages for the last 1, 7, 14, 30, or 90 days on the right side.
Default Landing Page always provides 100% traffic.
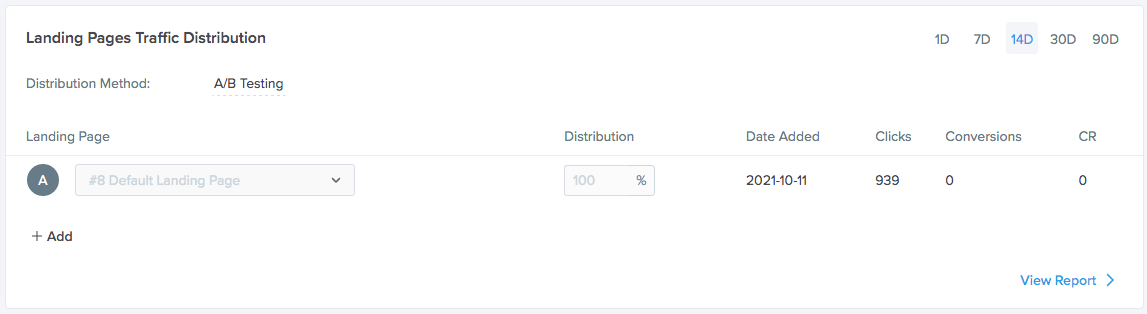
When adding other Landing Pages and choosing a percentage value, the percentage value for the Default Landing Page will automatically decrease. The sum total of all percentages must be 100%. You can enter a value for a Landing Page, and it must be less than option A (for a Default Landing Page).
The next option is added when you click on the [+ Add] button (C, D, E…).
Rotation
Purpose: testing new Landing Pages, rotating between all Landing Pages in equal proportions.

Redirecting with equal probability (randomly) to any active Landing Page visible to the Affiliate and suitable for targeting, including the default Landing Page.
Targeting Based
Purpose: redirecting traffic depending on targeting.
For example:
- Mobile - Landing Page 1,
- Desktop - Landing Page 2.

Redirects will go to the last added Landing Page that meets the targeting criteria.
Note: for A / B Testing, Rotation and Targeting Based, distribution by Landing Pages according to percentage is included only when link ID is not specified in the tracking link and traffic will be redirected to the landing page only if it is active, available to the affiliate, and suitable for targeting.